(See also Import Tool FAQs)
The Import Tool is available to any Admin User and can be found under the Tools menu in eCoordinator: 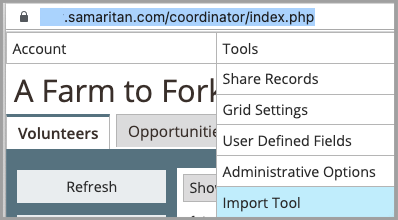
This will open a new page in your browser.
When first opening the Import Tool, the history of the account’s past imports will show:
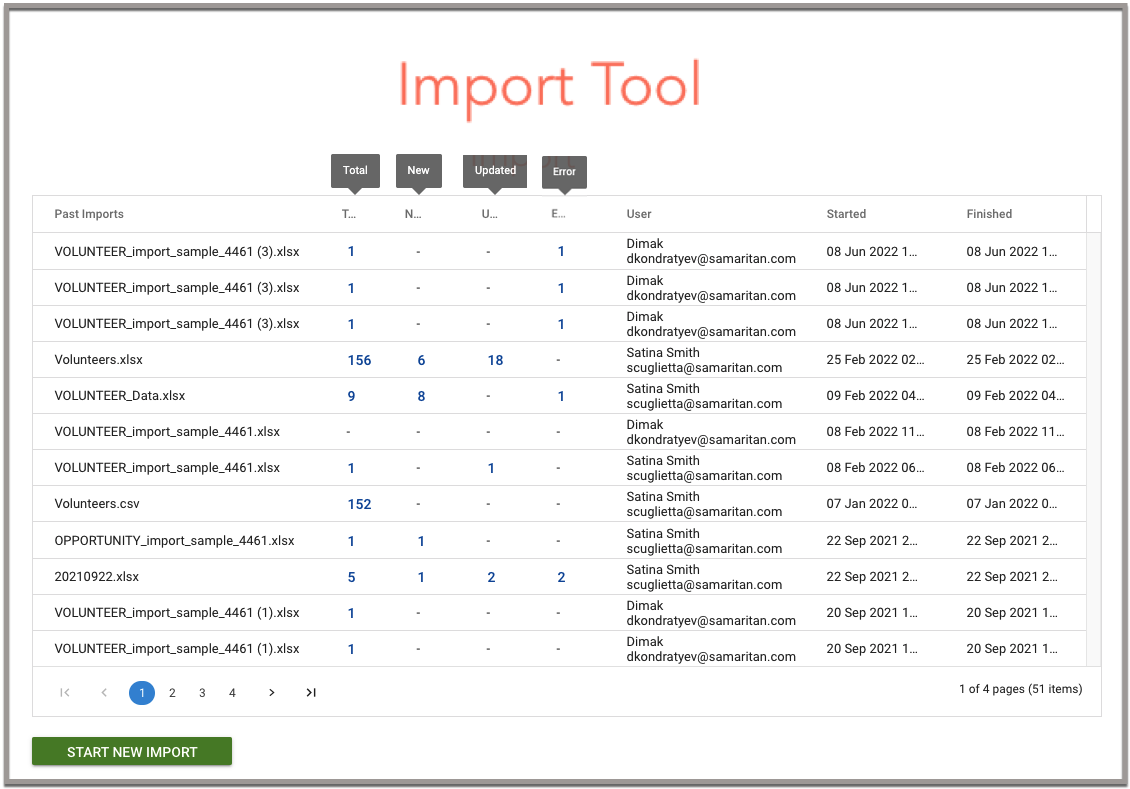
>> Click on the numerals in blue to view additional files imported
Prepare the Data
If you need help getting started, you can download a sample spreadsheet after clicking on the green "START NEW IMPORT" button. Choose which record type you are wanting to import and then click on "Download sample spreadsheet". This will export all available fields. If you are updating existing records, you can also create a data grid with the exact fields that you want to import.

Before Importing, make sure to:
-
Check the format of the data file: .csv, .xlsx, .xls, .txt (tab-delimited) file types are all supported, but xlsx is recommended.
-
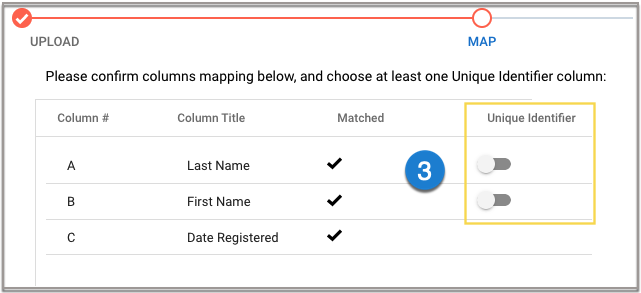
Review the data and identify which fields can be used as Unique Identifiers (UIDs) and check for duplicates. For example, if “email address” is being used, make sure no two records have the same email address. Or, try a combination of fields, such as: First Name, Last Name, plus Date of Birth.
-
Prepare to map the data elements by matching up column headers from the original data set with Samaritan field names. There are two ways to find the names of the columns:
Column Names
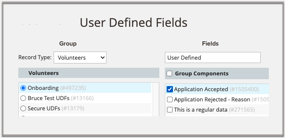
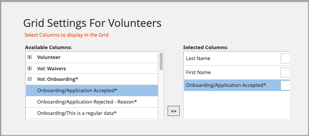
note: User Defined Fields (UDFs) must include the group name. In this example, the field name is: Onboarding/Application Accepted
Import
To advance to the next screen, click on:

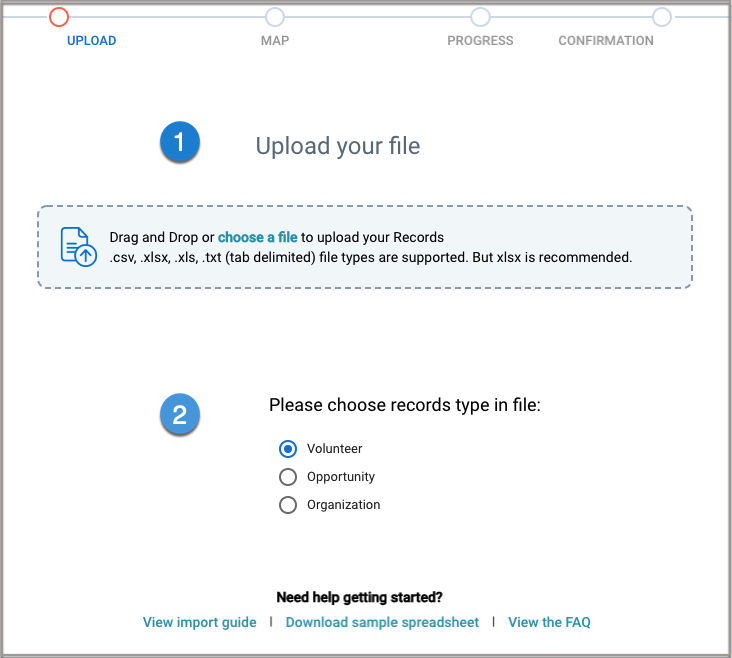
Upload your file:
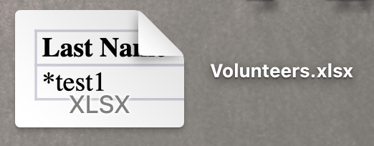
The history also shows the name of the user who uploaded the data and the time the import was started and when it finished. Your import will be the name of your file.
Upload your file and Choose the record type: Volunteer, Opportunity, or Organization
A message will how indication the upload was successful:


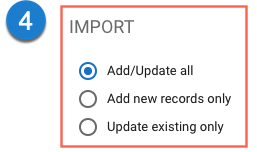
Add/Update all - this option will add a record for every row (duplicates would need to be consolidated later)
Add new records only - this option checks current data and only adds new records or new data in the fields
Update existing only - ignores records that are not currently in the database and will not create new records
Select Update Rules
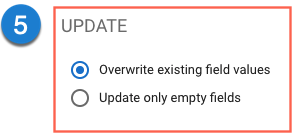
Overwrite existing field values - replaces data in the database with new data from the import
Update only empty fields - data from import will only be added if the field in the record is empty.
To clear out fields - to empty a field of its contents, please use NULL in the field and the data in the corresponding field will be removed.

View Settings
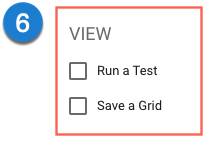
Overwrite existing field values - replaces data in the database with new data from the import
Update only empty fields - data from import will only be added if the field in the record is empty
Watch the loading indicator
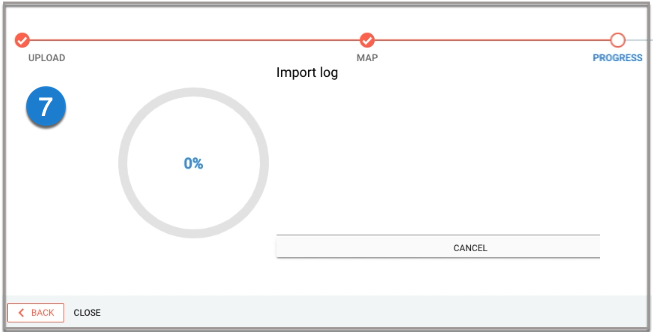
Finish!
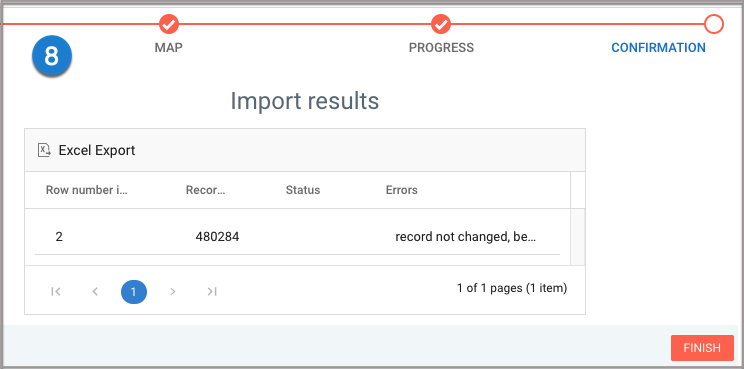
Clicking Finish will return to the first screen where the Import’s history can be viewed. If selected, the grid will also be available in eCoordinator with the import data and file name.