Possible Actions with On Demand Automations
- Send Email
- Send Text
- Make Placement or Referral
- Update Field Values
- Add Options to a Drop-Down Style User Defined Field (UDF)
- Create Profile Snapshot
- Disable Login
- Delete
- Recycle
Building Your Automation
-
Starting the Process:
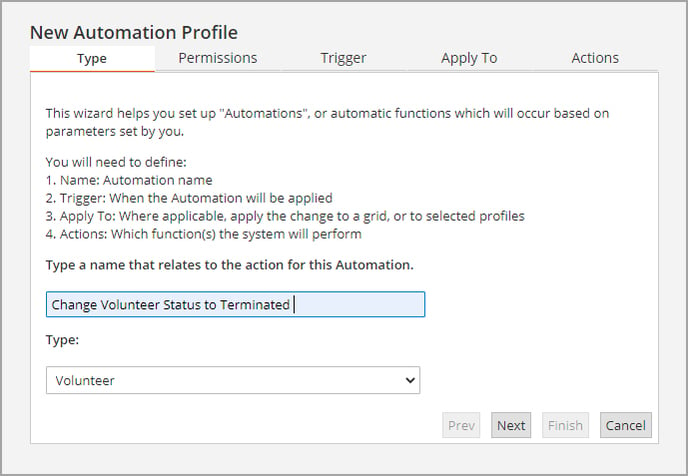
- Launch the Automations Wizard and click 'New'.
- Name your automation descriptively to avoid confusion.
-
Selecting the Profile Type:
- Choose the profile type (volunteer, opportunity, organization, or scheduled shift) from the 'Type' dropdown.
- Click 'Next'.
-
Setting Permissions:
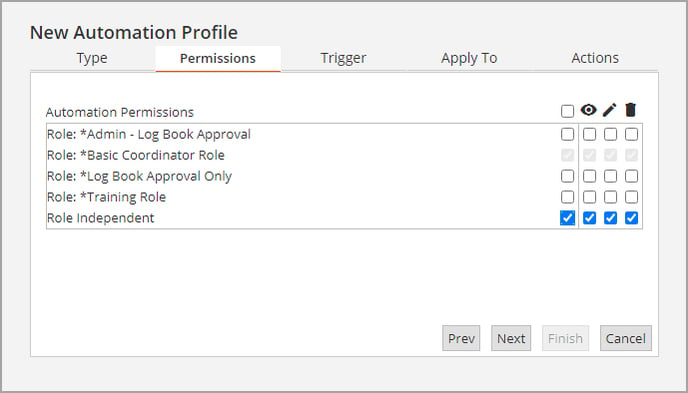
- Assign access to appropriate users with the necessary authority. Your role will be preselected and greyed out.
- Click 'Next'.
-
Choosing the Trigger:
- Select 'On Demand' as your trigger and click 'Next'.
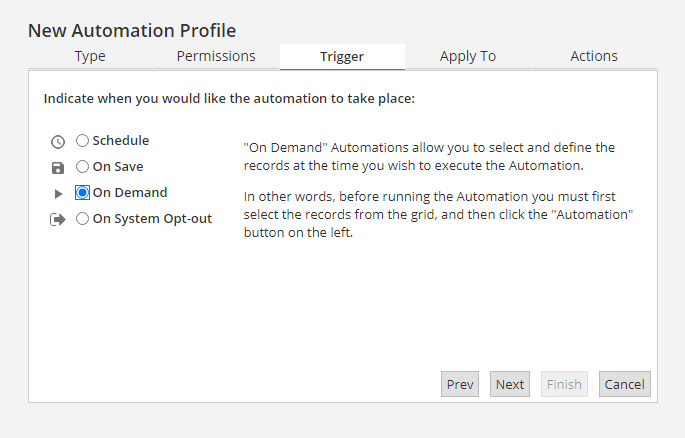
- Select 'On Demand' as your trigger and click 'Next'.
-
Defining the Scope:
- Choose the profile or fields the automation will apply to:
- Current Record: Applies only to selected records at the time of running.
- Saved Grid
- Condition/Formula: Acts like a filter for large groups based on specific criteria.
- Click 'Next'.
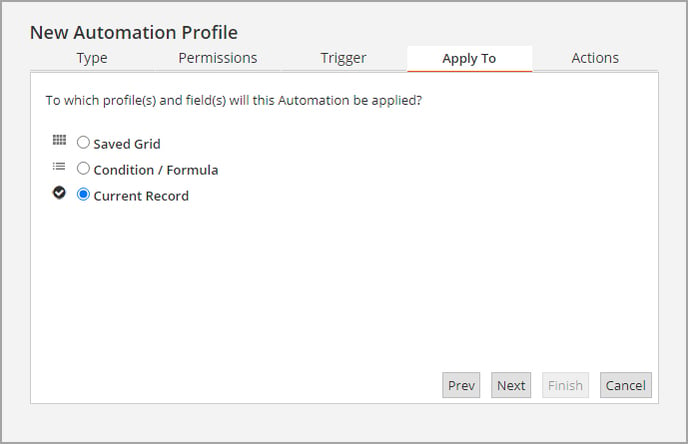
- Choose the profile or fields the automation will apply to:
-
Specifying the Action:
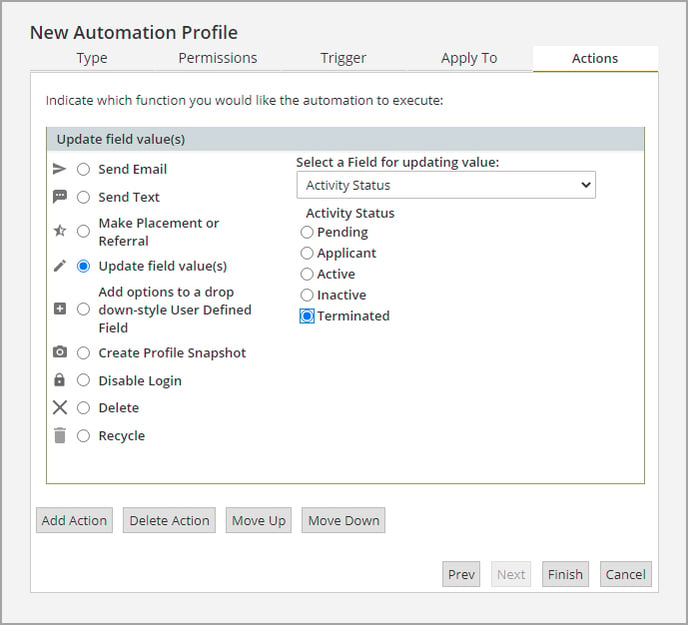
- Choose the action, e.g., updating the volunteer's status to 'Terminated'.
- Select 'Update field value(s)' and choose the specific field and value from the dropdown list.
- Click 'Finish'.
-
Finalizing the Automation:
- The new automation will appear in the admin automations list, turned on by default. Turning it off will remove it from the On Demand automations list in the system.
Running Your Automation
-
Accessing the Correct Profile Section:
- Navigate to the profile section where the automation will be applied (e.g., Volunteer tab for Volunteer type).
-
Selecting Records (if applicable):
- For a few records, select them and choose 'Only Selected Volunteers' under the Automations button.
- For all records in a grid or account, no selection is necessary.
-
Executing the Automation:
- Open the On Demand Automations list, select your automation, and click 'Run'.
- A confirmation window with an estimated completion time will appear. Click 'OK'.
- The Automations Queue will open, displaying progress (optional to view).
-
Post-Execution:
- Once complete, the action taken will be recorded in the profile's history tab.
Caution on Triggering Additional Automations
Running an On Demand Automation that aligns with the trigger of an existing On Save Automation may initiate additional automations. A warning will inform you about these potential On Save Automations before you click 'Run'. Notifications about any additional automations in progress will appear in the upper right corner of your screen.
