The Surveys tool is where we match up what we want to ask with whom we want to ask. Remember you can access the system either from the "Tools Menu" or the "Opportunity Profile Survey Tab," see Preparing Surveys for Volunteers section for more information.
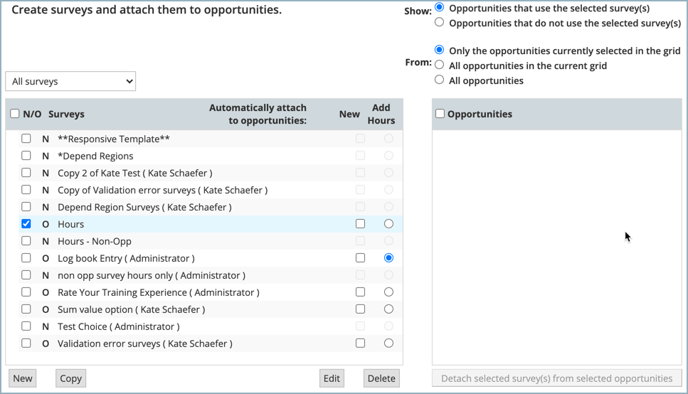
From Tools> Administrative Options> Surveys, you will view all surveys and all opportunities within your eCoordinator account.
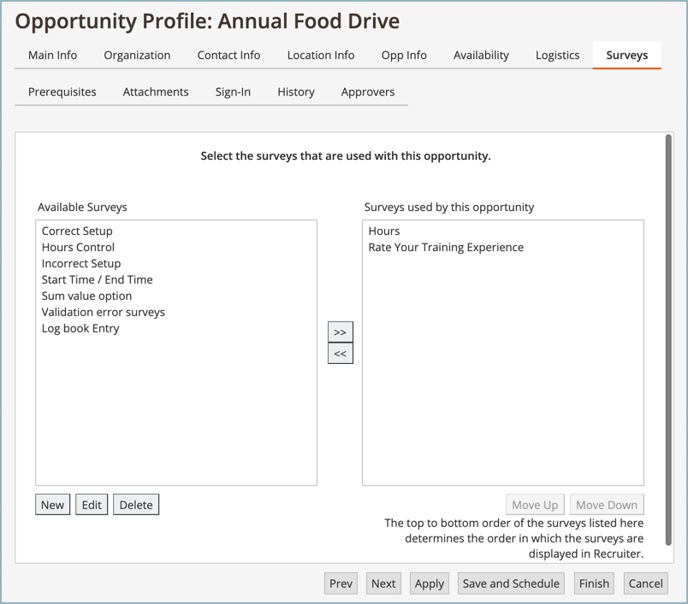
While from the "Opportunity Profile Survey Tab" you will view all surveys but only in relation to that one opportunity.
The "Log Book Entry" survey is a default survey and will display automatically within your account. You can create a new survey, edit or delete it, or even copy an existing survey to be used as a template for a new survey. Copying is done from the Tools Menu surveys by clicking Edit.
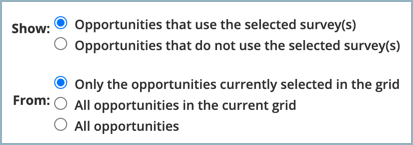
Surveys from the "Tools Menu" allow you to control the view of which surveys and opportunities display by their relationship. Make sure you have chosen the preferred selection; otherwise some surveys or opportunities will not display in the corresponding boxes.
There is a lot of flexibility in this program, so do not worry if you do not have everything perfectly entered the first time around. When you are ready to edit, copy, or create a new survey and you click on any of the buttons, the "Edit Survey" screen will appear.
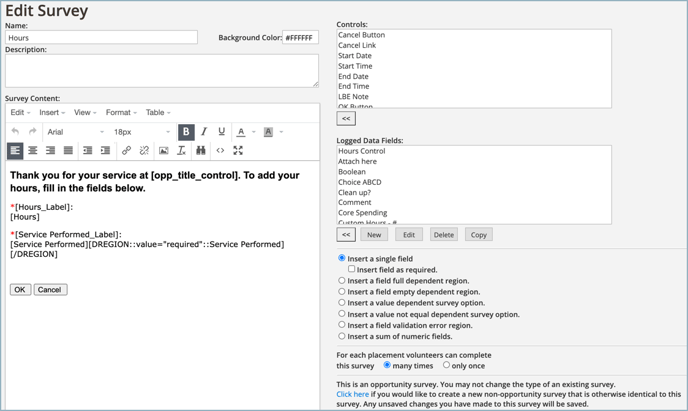
Select the text in the "Name" field and type in an easily identifiable title like, "Volunteer Quality Satisfaction Survey." This is the name you will see in survey box and volunteers will see via the eRecruiter.
Survey LBE Permissions
Before you complete the survey you will also want to define whom may take, view, and edit the survey: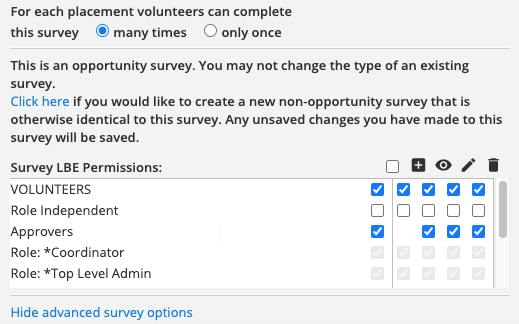
The primary section of the "Edit Survey" screen is the "Survey Content" where you will set up the form and function of your survey including the questions and answers, what are called Logged Data Fields.
The "Survey Content" section has a HMTL toolbar which helps you to set up the view of the survey. You can format your survey with pictures, colors, fonts, tables. alignments, etc. Once you set up the look of the survey including text and pictures, do not forget to add the "Logged Data Fields" in the appropriate positions.

The "Logged Data Fields" represent the area where and how volunteers will provide answers. All of the available "Logged Data Fields" that you created display in the box of the same name in the bottom, right hand corner. To include logged data in this survey, transfer them to the box on the right by clicking on the small left facing arrows at the bottom of the data field. This will insert the logged data name into the survey field in square brackets.
For more information on "Logged Data Fields, including creating new fields, see the section on Logged Data.
If you are using eRecruiter, you should insert an appropriate question before each bracketed piece of logged data. Otherwise only the response field will be visible to those taking the survey.
There are a number of Controls you may chose to add to your survey such as "Start Time" and "End Time" or "Cancel Link" or "Cancel Button." These options are found in the "Controls" box directly below the "Survey Groups Permissions." These elements may be added in the same manner as the "Logged Data Fields" and may make your survey more user-friendly to volunteers.
Before you save the survey you may want to "Preview" it and see how it will appear to your volunteers.
Click OK to save your work. Select Finish to return to the main work area.